


Powering Your Trail Cam with the Sun: Reviewing the Solar Panel Kit as Supplied by BlazeVideo

One of the problems with powering trail cams is that they can chew through your batteries.
Particularly when the IR LEDS are activated for your night-time videos.
Often, I have a mix of a couple of hundred videos and photos during a 24 period of capturing wildlife.
Frankly, a lot of them show no animals at all but the sensors got triggered by waving branches or lashing rain…
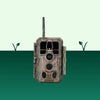
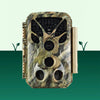
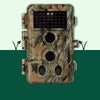
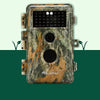
The 8 AA batteries I put in the BlazeVideo A280W Trail Cam lasted about a couple of weeks.
Could a dedicated solar panel be the solution?

I’ve got a few small solar panels for some of the LED floodlights around the homestead.
They do the job but they are prone to fail after a few years.
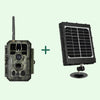
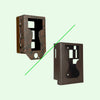
This generic, Blazevideo Solar Panel Kit, has a 3W monocrystalline silicon high quality panel and comes with a massive 8000mAh battery inside.
That’s the first pleasant surprise.
The second one is that there are 3 output levels: 12V, 9V and 6V.
Blazevideo Solar Panel Kit
Power In is 5V and each of the 4 ports come with their own cable.
That’s a lot of flexibility for this one unit which allows you to use it for many applications.
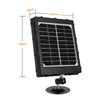
There are 4 red LEDs to indicate the level of charge and 1 green LED to indicate charging.
Charging by USB takes about 5 hours. Which is 8 times faster than letting the sun do it.
The good thing is that both batteries and the solar panel can support the camera which would be good for prolonged periods of darkness.
Also, the solar charging is affected by where you put the panel: if it is under a tree canopy in the bush only a bit of light would filter through.
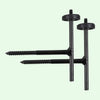
There is a mini tripod of sorts with the panel that allows you to angle it towards the sun. You can screw the tripod into a tree or other structure.
There’s also a 1.5m belt for other fastening possibilities.
We moved the solar panel around a few times when using the A280W trail cam as a security camera.
Generally, a fixed position would be best for a solar panel setup. Out in the bush with only scattered light it will not be as effective of course.
With a fixed position it will be easy to get the best angle towards the midday sun.
Blazevideo Solar Panel Kit
Some Experiences
I tried my hand a making a timelapse video by shooting 23GB of photos one evening.
The new Energizer batteries ran out after close to 10000 images in about 4 hours!!
Had I connected the Solar Panel it would have cost me nothing in expensive batteries, I could have gone all night with the project and would have been able to recharge that big battery for pennies…
Or for nothing if it had been sunshiny weather.
This Solar Panel is the way to go.
I must say, my project was way too ambitious as normally – with motion detection – batteries will last for weeks.
They would last even longer if they could come up with an algorithm that would detect waving branches or rainy weather so that we don’t end up with countless videos when nothing happens…
But with judicial placement and good weather, battery life should not be much of a problem.
However, the Solar Panel is the better solution.
Recommendation
I highly recommend this solar panel from BlazeVideo.
They sell them in 3 capacities but this 8000mAh version will give you the endurance you would want for those rainy and overcast days. Price is only $119.
The built quality is good. The whole unit is waterproof with the power ports sealed off nicely.
What I love is the flexibility to power not only trail cams but everything that needs 12V, 9V or 6V.
Even if you don’t have a trail cam you just might want to get yourself a unit like this.
Have a look at the BlazeVideo site here.
And for the product page, currently on special at time of publish for AUD $119.99, down from AUD $159.99.
- Posted by Martin Regtien | Sep 21, 2022
Leave a comment